- Install and activate the base plugin(o365) in user site. After activate the plugin go to the office 365 setting page and copy the URL from address bar for create the Azure App.
- Login on https://portal.azure.com/ and click on Azure Active Directory and create APP by App Registration.
Below settings need to be done in Azure App. Azure Active Directory > App Registrations > My Custom App Name > Settings > Reply URLshttps://[domain.com]/wp-admin/admin.php?page=o365_settings - Required Permissions: Azure Active Directory > App Registrations > My Custom App Name > Settings > Required Permissions (See additional instructions specific to the solution in question).
- Application Id: Azure Active Directory > App Registrations > My Custom App Name > Application Id
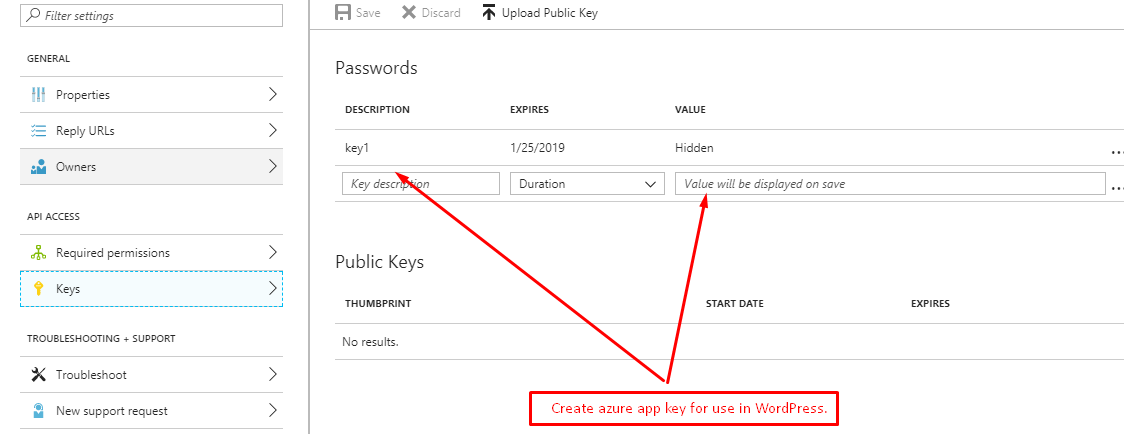
- Application Key: Azure Active Directory > App Registrations > My Custom App Name > Settings > Keys
Create Key:
- Tenant Name: Example: “mytenant” – taken from “mytenant.onmicrosoft.com”
- Office 365 User Id (Optional): Azure Active Directory > Users – All users > (User Name) – Profile > Object ID
- After creating the Azure APP, go to the site wp-admin office365 setting page to enter the Application ID, Application Secret Key and tenant domain name, then click on Save settings & Get Authentication Button.
- Install and activate the user authentication plugin. After activating the user authentication plugin go to the Office 365 setting page and click on user tab and user need to setup the setting under user tab. This user tab setting is compulsory because when user is login with azure account then redirect to relevant URL.