Prerequisite
To get started, you will need a Yammer account with which to build and test your app.
Sign up for free at www.yammer.com.
- Step 1: Register an app with Yammer
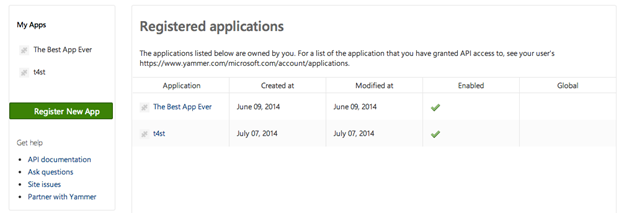
- Go to https://www.yammer.com/client_applications. Click on the “Register new App” button. Please note, when you create an app, this app will be linked to the Yammer network related to your user account. This is the network you will use to access, edit, and test your application.
- Consider using a service account when registering your app at https://www.yammer.com/client_applications. i.e. “[email protected]” – This will ensure your app continues to work if you or the app creator leaves the company.

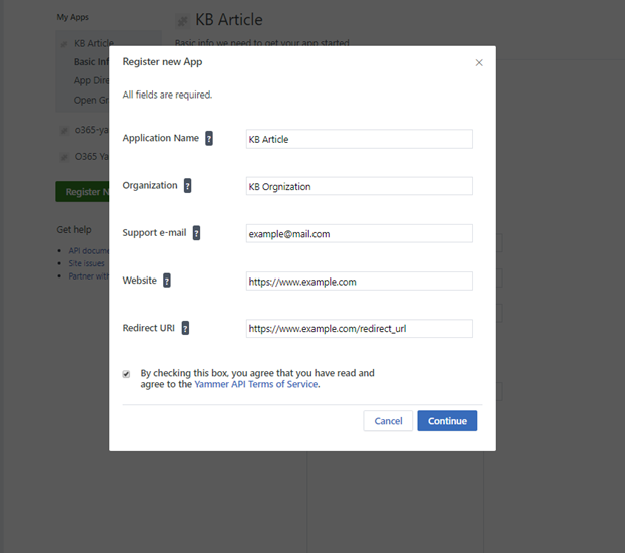
| Register a New App – Required Fields: | Description |
| Application Name: | The app name which will appear in Yammer’s activity stream. |
| Organization: | The name of the organization affiliated with your app. |
| Support e-mail: | An email address, which users of your app can contact for support. |
| Website: | Your organization’s website. |
| Redirect URI | WordPress Admin URL https://yoursite.com/wp-admin |
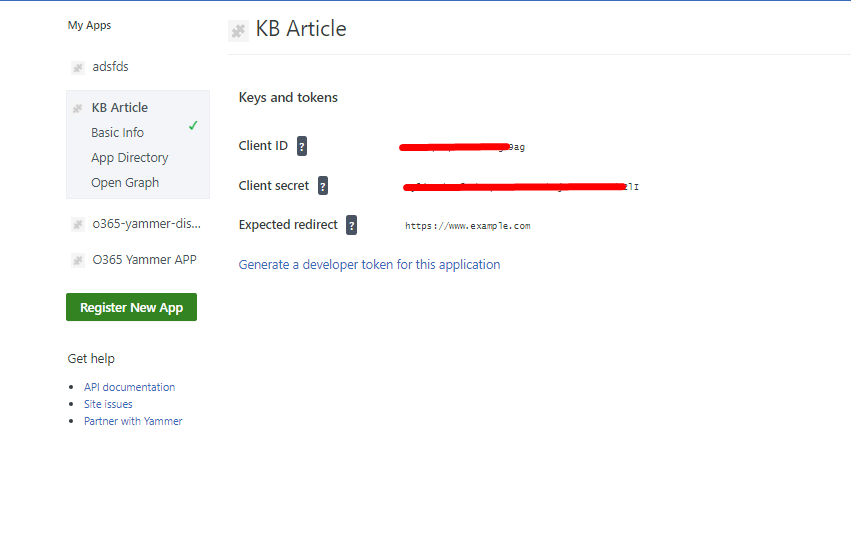
Click on Continue copy client ID and client secret
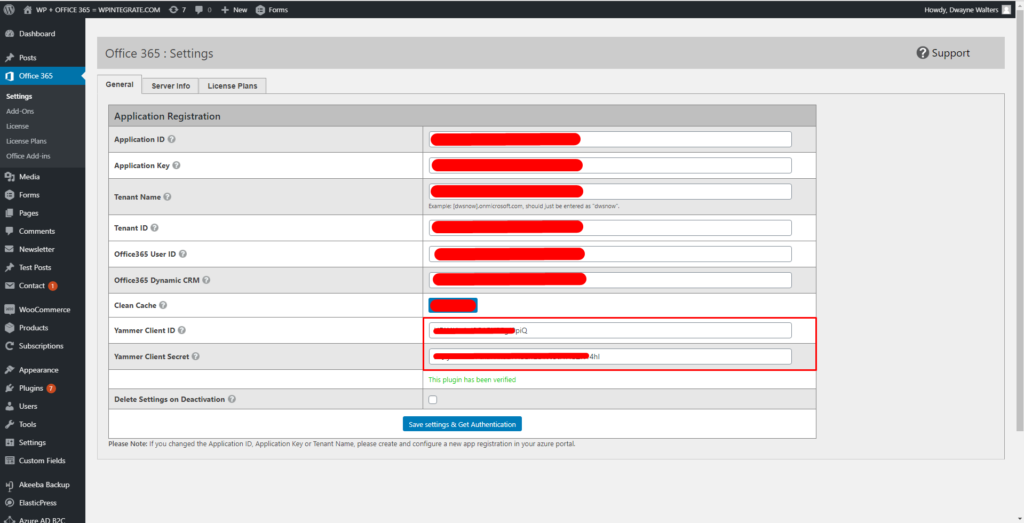
Go to your website and open Office 365 General Settings.
1. Paste Client Id in the Yammer Client ID input box.
2. Pase Client Secret in the Yammer Client Secret.
3. Upload Yammer Plugin .zip file using FTP or WordPress Plugins section.
4. Activate the Plugin, after activation you will redirect to
5. App Authorization
Once Yammer has successfully authenticated the user, the OAuth 2 dialog will prompt them to authorize the app. If the user clicks “Allow”, your app will be authorized.


